Vi è mai capitato di improvvisare uno shooting?
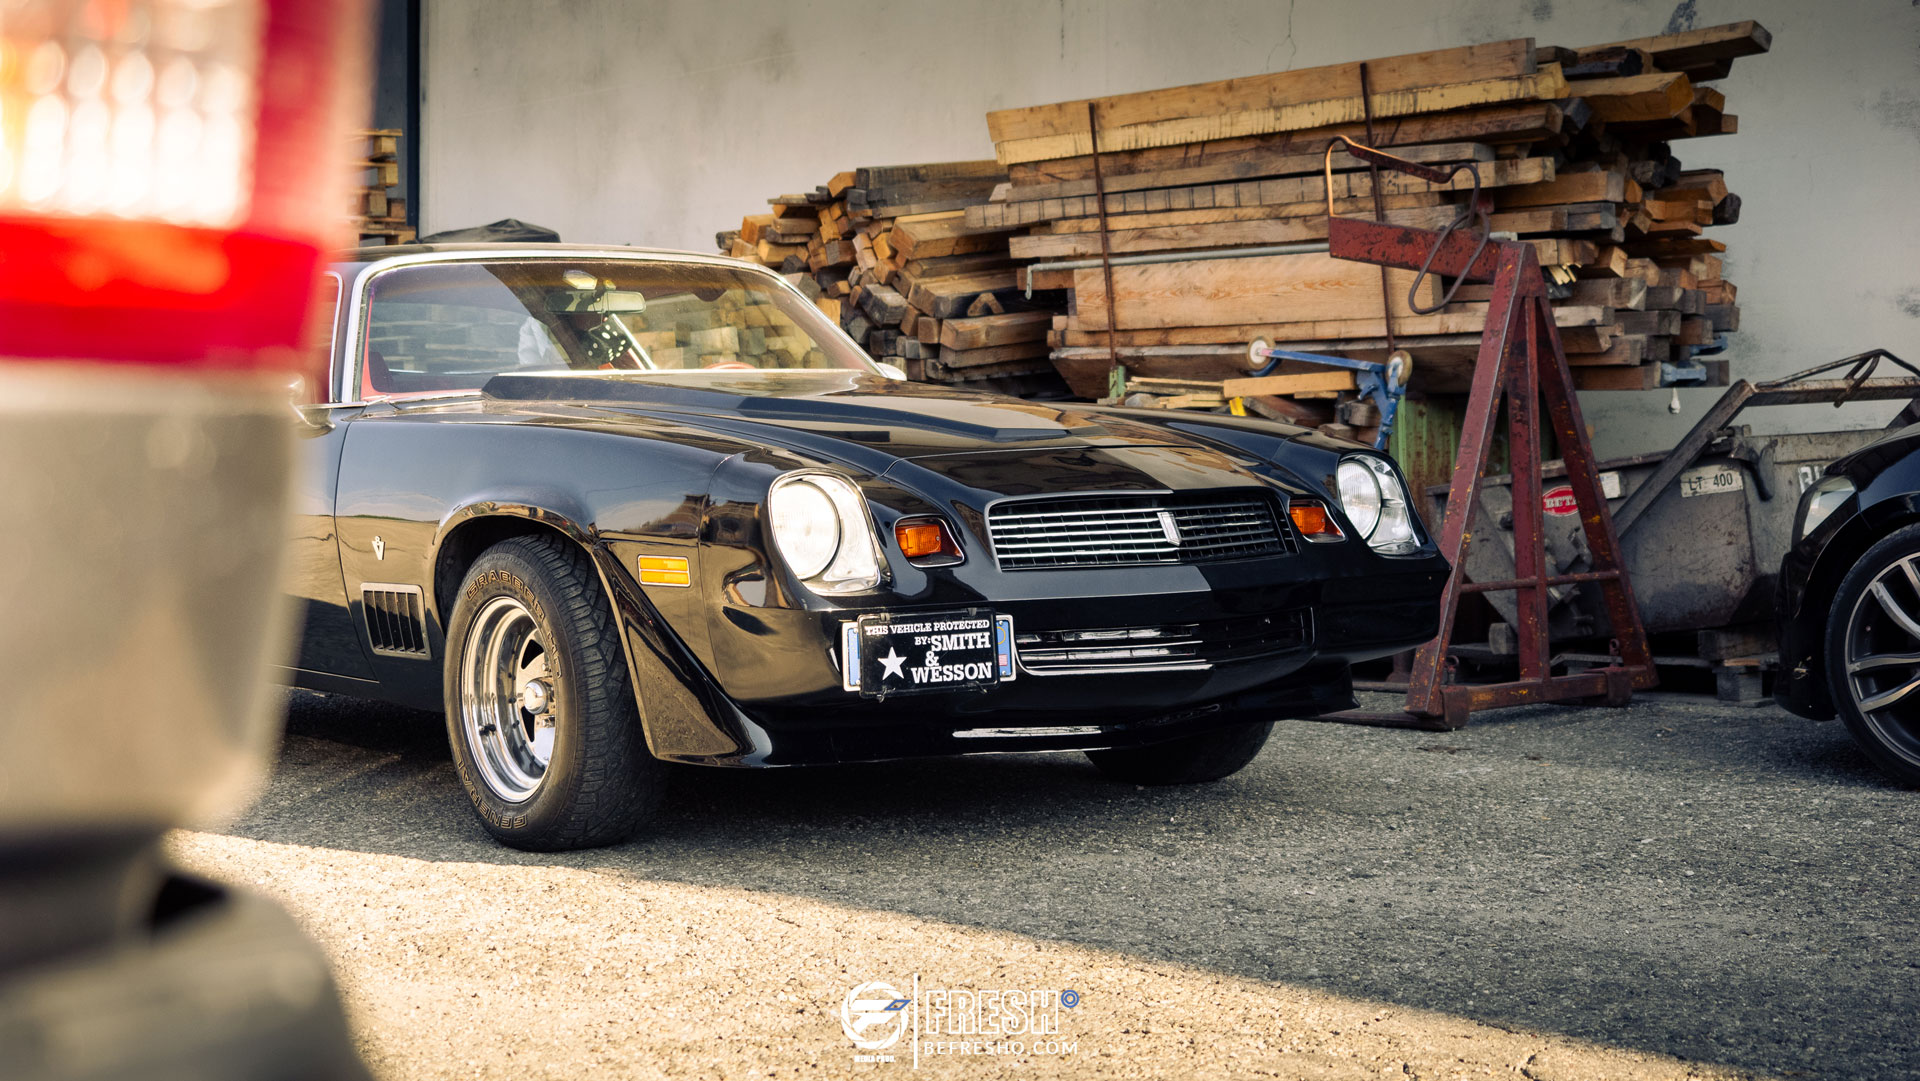
Quel weekend avevo programmato di andare a vedere una mostra fotografica e poi da li andare a fare delle allegrissime foto nei vari borghetti che si trovano sulle rive del Po. Come ogni volta, durante il tragitto, mi guardo sempre attorno per scrutare qualche occasione fotografica e proprio quel giorno, dietro al cancellone di quello che potrebbe essere il piazzale di una fabbrica, scorgo all’interno due persone che lavorano ad una Shelby e accanto vedo una Camaro nera, sicuro anni ’70. Cosi decido di fermarmi e fare un atto di coraggio, parlare con i due signori con la speranza di ottenere il permesso per fare delle foto alla Camaro.
Have you ever had to improvise a shooting?
That weekend I had planned to go to see a photographic exhibition and then from there go and take some very cheerful photos in the various villages on the banks of the Po. As every time, during the journey, I always look around to scrutinize some photographic opportunities and that very day, behind the gate of what could be the square of a factory, I see two people inside working on a Shelby and next to me I see a black Camaro, certainly from the 70s. So I decide to stop and do an act of courage, talk to the two gentlemen with the hope of obtaining permission to take photos of the Camaro.


Cosi è stato, mi presento e chiedo il permesso di fotografare. Le due persone sono Padre e figlio e si dimostrano disponibilissimi e aperti nel farmi fotografare.
Il tutto procede benissimo tra tante chiacchiere e aneddoti, scoprendo di avere anche conoscenze in comune. Dopo una mezz’oretta e una 50ina di foto totali, lascio i signori lavorare in pace e io me ne torno in macchina con un sorriso a 32 denti.
So it was, I introduce myself and ask permission to take photographs. The two people are father and son and they are very available and open to letting me take pictures.
Everything goes very well with lots of chatter and anecdotes, discovering that we also have acquaintances in common. After half an hour and about 50 photos in total, I leave the gentlemen to work in peace and I go back to the car with a toothy smile.


TECNICA
Mi ricollego alle parole usare per l’apertura di questo articolo: Vi è mai capitato di improvvisare uno shooting?
Ecco ne approfitto di questa domanda per raccontare come gestisco questi tipi di lavori, soprattutto quando i tempi sono stretti.
Solitamente appena arrivo cerco di capire dal proprietario che libertà ho, poi guardo la situazione generale, luci, posizione dell’auto, attrezzatura disponibile. Valutato tutto, tiro le somme per riuscire a fare il lavoro nel modo più veloce ed efficiente possibile.
TIPS
I refer to the words used to open this article: Have you ever improvised a shooting?
Here I take advantage of this question to tell you how I manage these types of jobs, especially when times are tight.
Usually as soon as I arrive I try to understand from the owner what freedom I have, then I look at the general situation, lights, position of the car, available equipment. Having evaluated everything, I sum up to be able to do the job in the fastest and most efficient way possible.


Qui di seguito vi metto una lista per argomento di come gestisco ogni cosa:
- Fotocamera: Fortunatamente con OM System posso contare su una stabilizzazione mostruosa e quindi posso fare tranquillamente a meno del cavalletto quindi un problema in meno. Come prima cosa valuto luce e location e cerco di capire che spazio ho per scattare e se ho bisogno di diaframmi aperti. Il passo successivo è di valutare l’attrezzatura da usare, quindi se usare 1 o 2 fotocamere, quali lenti montare e se necessario altri accessori come luci, faretti o filtri. Solitamente se utilizzo solo una fotocamera allora cerco di fare tutto con una lente sola, al massimo due (uno zoom e un fisso) e meno accessori possibile.
- Gestione della Luce: Per prima cosa valuto quanto è forte lo stacco tra ombra e luce e decido come mettere il soggetto, se non posso spostarlo valuto se ha senso fotografarlo o se in post è possibile recuperare. Se si ha a disposizione un polarizzatore, consiglio vivamente di usarlo (ovviamente in occasione di tanta luce). Qui un esempio di come ho recuperato una foto in post
Below I’ll give you a list by topic of how I handle everything:
- Camera: Fortunately with OM System I can count on monstrous stabilization and therefore I can easily do without the tripod so one less problem. First of all I evaluate the light and location and try to understand what space I have to shoot and if I need open apertures. The next step is to evaluate the equipment to use, therefore whether to use 1 or 2 cameras, which lenses to mount and if necessary other accessories such as lights, spotlights or filters. Usually if I only use one camera then I try to do everything with just one lens, at most two (one zoom and one fixed) and as few accessories as possible.
- Light Management: First I evaluate how strong the gap is between shadow and light and decide how to position the subject. If I cannot move it I evaluate whether it makes sense to photograph it or whether it is possible to recover it in post. If you have a polarizer available, I highly recommend using it (obviously when there is a lot of light). Here is an example of how I recovered a photo in post


The glass had this foggy effect due to too much light outside and shadow inside
- Inquadrature: Nel mondo automotive ci sono 4 o 5 inquadrature standard che generalmente con quelle sono sicuro di portare a casa il servizio, oltre a quelle ci sono altre foto dove si coinvolge di più il background o altri elementi per dare più narrativa alla foto. Un dettaglio a cui stare attenti sono i riflessi sull’auto, soprattutto in quelle con vernici molto riflettenti e ai dettagli cromati, perché si rischia di inserire elementi di disturbo come noi stessi mentre scattiamo o altro. Se si vogliono fare scatti in controluce e il paraluce non copre bene, ci sono piccoli accorgimenti segretissimi che solo dopo anni di insegnamenti del Maestro Yoda si possono applicare, come in questo caso. Il controluce annebbiava troppo l’immagine, cosi ho messo una mano davanti alla lente per tagliare il sole, poi un bel crop in post produzione per rimuoverla e via che lo scatto è riuscito.
- Shots: In the automotive world there are 4 or 5 standard shots that generally with those I am sure of bringing home the service, in addition to those there are other photos where the background or other elements are more involved to give more narrative to the photo. A detail to pay attention to are the reflections on the car, especially in those with very reflective paint and chrome details, because there is a risk of introducing disturbing elements such as ourselves while shooting or otherwise. If you want to take shots against the light and the lens hood doesn’t cover well, there are small, very secret tricks that can only be applied after years of Master Yoda’s teachings, as in this case. The backlight clouded the image too much, so I put a hand in front of the lens to cut out the sun, then a nice crop in post production to remove it and the shot was successful.


- Postproduzione: solitamente il workflow è quello di fare una prima setacciata di immagini e scartare quelle che non mi piacciono. Per questa fase uso Photomechanic, uno dei software più rapidi che ci sia nel leggere i file RAW. Molto utile soprattutto se si hanno molte serie di raffiche da controllare e per tanti automatismi che utilizzo quando faccio commissioni per agenzie. Dopodiché Passo in Lightroom e inizio a creare i preset che poi applicherò a tutte le foto. Fatto questo step, mi dedico alla seconda scrematura e in base al tipo di shooting cerco di stare sui 15/30 foto massimo. Finito questi passaggi resta solo la pubblicazione.
Qui vi mostro l’effetto del preset che ho creato per questo shooting.
- Postproduction: usually the workflow is to make an initial sift of images and discard the ones I don’t like. For this phase I use Photomechanic, one of the fastest software available for reading RAW files. Very useful especially if you have many series of bursts to control and for many automations that I use when I run errands for agencies. Then I go into Lightroom and start creating presets that I will then apply to all the photos. Having done this step, I dedicate myself to the second skimming and based on the type of shooting I try to stay on 15/30 photos maximum. Once these steps are finished, all that remains is publication.
Here I show you the effect of the preset I created for this shooting.


Aside from the basic controls, here I gave the lights a more yellow tone to better convey the feeling of heat that was there that day.
Ora spiego come ho gestito questo shooting e il perché delle scelte.
Quel pomeriggio avendo a disposizione solo una OM-1 ho dovuto ragionare se utilizzare solo una lente o due. Avendo con me il 12-40 2.8 PRO II, il 12-100 4.0 PRO, il 45 1.2 PRO e il 40-150 2.8 PRO, ho optato per utilizzare il 12-40 2.8 PRO II a discapito del 12-100 4.0 PRO perché ero sicuro che per avere la giusta esposizione nelle zone d’ombra sarei dovuto salire con i tempi, quindi la sua apertura mi faceva comodo. Il 40-150 2.8 PRO l’ho escluso subito perché troppo lungo per l’area che avevo a disposizione, il 45 1.2 PRO lo avrei usato se avessi avuto più tempo per concentrarmi sui dettagli, ma alla fine sono riuscito a fare tutto col 12-40 2.8 PRO II.
Vedendo che la macchina era in un’ottima posizione per la luce naturale non l’ho fatta spostare, mi sono concentrato molto sui riflessi e di evitare ombre che tagliassero l’auto o che lo sfondo fosse troppo presente. Sono partito dall’esterno, per poi fare il motore e poi i dettagli interni. Fatta questa prima parte, mi sono ricontrollato le foto, fatto due chiacchiere veloci per rinfrescare un attimo la mente, valutare ancora una volta tutti i dettagli il contesto ecc. e poi effettuare gli ultimi scatti.
Now I explain how I managed this shooting and the reasons for the choices.
That afternoon, having only one OM-1 available, I had to think about whether to use just one lens or two. Having with me the 12-40 2.8 PRO II, the 12-100 4.0 PRO, the 45 1.2 PRO and the 40-150 2.8 PRO, I opted to use the 12-40 2.8 PRO II to the detriment of the 12-100 4.0 PRO because I was sure that to have the right exposure in the shaded areas I would have to go up with the times, so its opening was convenient for me. I immediately excluded the 40-150 2.8 PRO because it was too long for the area I had available, I would have used the 45 1.2 PRO if I had had more time to concentrate on the details, but in the end I managed to do everything with the 12 -40 2.8 PRO II.
Seeing that the car was in an excellent position for natural light, I didn’t make it move, I concentrated a lot on the reflections and on avoiding shadows that cut the car or that the background was too present. I started from the outside, then did the engine and then the internal details. Having done this first part, I checked the photos again, had a quick chat to refresh my mind for a moment, evaluate all the details, the context, etc. once again. and then take the final shots.


Come vedete per fare uno shooting alla fine basta solo una macchina fotografica e un obbiettivo, il resto che vi serve è solo voglia di scattare.
Con questo è tutto, vi lascio i link alla galleria Flickr dove potete vedere il resto dello shooting
Noi ci vediamo alla prossima e mi raccomando:
Be classic, be racer, be fresho
As you can see, to do a shooting in the end all you need is a camera and a lens, the rest you need is just the desire to shoot.
That’s all, I leave you the links to the Flickr gallery where you can see the rest of the shooting
We’ll see you next time and I recommend:
Be classic, be racer, be fresh
Lascia un commento